It’s been a little while since the bike build started so time once again to get on with assembling my Specialized S-Works Enduro. This time it’s one of the most fiddly parts, the headset.
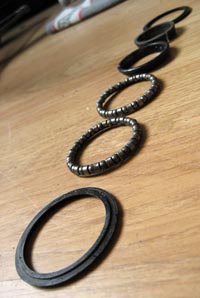
One of the first things you’ll notice when you get your new headset out of the box is the fact that it’s made up of a series of seemingly separate pieces, most of which are in the shape of rings which fit around your steerer tube. There are two obviously larger pieces though which are called the headset cups and these are the parts which actually attach to your frame.
Installing headset cups is one of the most risky elements of a bike build as they take a fair bit of force to insert into the head tube on the frame. And, without specialist equipment, that force can make a right mess of your frame. Having talked to a number of people about it I’ve been well warned off trying a bodge job involving blocks of wood, hammers, screwdrivers and gouged fingers. It’s easy to damage both a frame and a headset if you don’t do it right, so if either of yours are lightweight and expensive then it’s probably worth getting down to the shop for this bit.
I’ll go through the process here anyway though in case anyone wants to try it on a bike build using an old frame, but be warned, don’t try this on an expensive bike – for example an S-Works Enduro… Recently I read an article on building your own headset press which might take some of the risk out of the process, but it’s still not recommended for first timers. I’ve also been toying with making some videos about this, inspired by the DIY Bike Maintenance series which a friend referred me to a while back, but that’s still on the to-do list.
The other reason for going through it is that you might want to replace your forks at some point and this means knowing a fair bit about the headset. It doesn’t involve installing headset cups though so it’s a much more do-it-at-home building job!
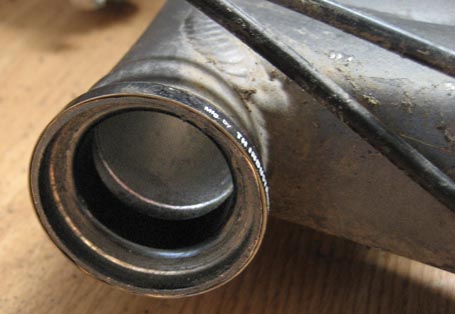
Anyway, the first step in your headset build is getting those cups in. Make sure that the inside of your head tube is clean and smooth before you start. Then check your headset instructions to see which cup goes in the top and which goes in the bottom. Take the top one first and push it in as far as you can by hand, it should go in perhaps about half way. Now comes the risky part – place the bottom on the head tube on a solid surface and grab yourself a bit of wood from the nearest building site. Place the wood on top of the headset cup and then gently tap the wood to force the cup into the head tube. You need to make sure the headset cup is level the whole way in because as soon as it goes in at an angle you’re in trouble. Keep checking regularly as you’re tapping to ensure it’s going in straight. Once that’s done, repeat the process for the bottom headset cup. And breathe. It was only a short paragraph but that’s the most risky part over, and hopefully both your frame and headset are still in one piece and look something like the picture above!
The next part isn’t so much difficult as really fiddly. You now need to get your crown race onto the steerer tube on your fork. The crown race is the hoop that comes lower-most in your headset, as you’ll see in your instructions. It fits tightly onto the steerer tube of your fork and the bearings and headset rest and turn on top of it.
With any luck your crown race will have a notch in it for easy installation, such as those in FSA headsets. If not though it’ll take a lot of tapping with a hammer to work it right the way down to the base of your fork. Again, a bit of wood can be handy for this so as not to damage the crown race. One with a nice sharp edge should do the job, or if you happen to have a metal pipe the right size to fit over your steerer tube then that’s even better. Hammer down on the top of that to force the crown race to the bottom.
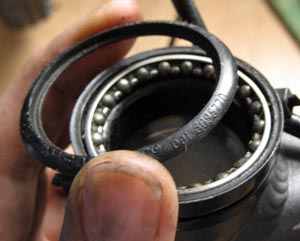
Now that the tricky parts are over the last job is simply to grease up the internals and place them in the right order in the headset. This will differ for specific headsets so look at the instructions supplied and hopefully they’ll provide some sort of exploded diagram. For a general guide follow the steps below and the pictures to the right. Place the bearings in the bottom of the headset and then slot the steerer tube through the hole so that the bearings now rest on the crown race.
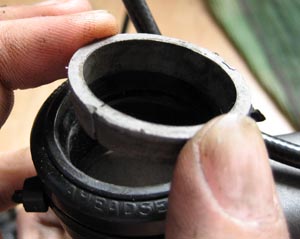
Next place the top bearings over the top of the steerer tube and into the headset cup. In the example shown here, the first of the series of 3 pictures to the left, you can see the bearings in the top of the headset cup with a plastic securing hoop about to be placed above it.
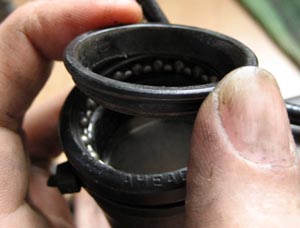
Next you should have another hoop, this time to seal the top of the unit, and it should be placed on top of the previous one as shown on the left.
And lastly, as shown in the last of the 3 pictures on the left, you will have a notched hoop which fits tightly to the steerer tube and should hold everything reasonably securely.
As it stands right now though the headset is still pretty loose – the bearings need to be loaded to run smoothly. This happens by tightening the top screw into the steerer tube, but that’s a job for a later time when I’ll talk about the steps needed to prepare and install a new fork.
I wont be so long between building posts this time though so hopefully I’ll see you there. Good luck with your bike build!


It’s an awesome post in support of all the internet viewers; they will obtain benefit from it I am sure.