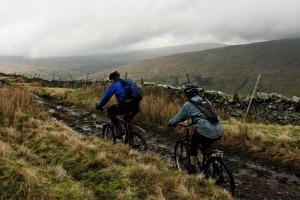
The winter time can play havoc with your motivation to ride, your time availability, but most importantly your bike itself. Muddier trails and wet roads attack the bike’s frame, wheels and drivetrain. This accelerates the wearing of components 10-fold compared to the summer months.
There are however some steps that you can take to make your winter riding more enjoyable, and far less damaging to your bike. Here are 6 of the best tips for making your mountain bike winter-proof.
Add mudguards
Mudguards used to be cumbersome accessories that were far from a cool bike upgrade. Nowadays however, there are lots of choices and designs on the market. Many of them are well-designed are discreet.
Installing mudguards on either the front or rear of your bike can make a huge difference to your riding comfort, by stopping you getting too cold and wet, but also vastly reducing the amount of mud and grit that gets thrown up at your eyes and face.
Change to winter-specific tyres
Mountain biking in the winter, especially on natural trails can be demoralising and a real struggle when it gets muddy. The absolute best way to make these types of rides more fun and productive is to upgrade to dedicated winter tyres.
Tyres like these have a number of key design features that make them great in the mud. Firstly, mud tyres are narrower, typically 1.8-2.0 widths for XC/Trail bikes, which cut through the mud much better than wider widths. Secondly, winter tyres feature deep, spiky treat patterns that grip the trail much better than lower profile models, both in a straight line and when cornering.
Thirdly, the treat will be spaced out widely, which whilst compromising rolling resistance slightly, sheds mud from the tyres and keeps them from essentially becoming slicks from the mud.
Lower tyre pressure
Sticking with the tyre theme, another tip to get more grip on tricky trails in the winter is to reduce the pressure in your tyres. Doing so allows more of the tyre to compress over the ground, which therefore improves their ability to grip.
This tip works best with tubeless tyres filled with sealant, as using tubed tyres with reduced pressure can lead to pinch or “snakebite” punctures if you hit a rock, root or other trail obstacle hard. Try reducing your tyre pressure in small increments of 0.1-0.3 bar to find the pressure which works best for you, your bike and your riding style.
Use a wet-lubricant
The drivetrain is arguably where the most damage will be inflicted when riding your mountain bike during the winter. The mud and grit that gets kicked up essentially acts as grinding paste, wearing down jockey wheels, chain links and chainring teeth.
Using a wet lubricant can really help minimise all of these issues. Unlike dry lube, wet lube won’t hold on to mud and grit anywhere near as much, and is far more resistant when being sprayed with water. Making sure the chain is lubed properly will help to prevent mechanical issues on the trail too, such as a snapped or twisted chain, which is the last thing you need during a cold and potentially wet winter ride.
Consider lock-on grips
When water is flying upwards at you from the front wheel, it doesn’t take long before it can get underneath your grips. This can pose quite a risk if the grips begin to rotate whilst you’re trying to control the bike at speed, so using some lock-on style grips can be a good way to alleviate this issue.
There are lots of different options on the market with a variety of grips designs and widths, so it’s not too difficult to find a style that you like and that fits your hand well. Other grips like the silicon grips on the market also work well in the wet, so either style can be used to replace foam or regular rubber grips that can be vulnerable to sliding around in the wet.
Switch out your brake pads
Next to the drivetrain, the brake pads are perhaps the components on your mountain bike that wear out the quickest. In the interests of money-saving and bike control, changing out your summer organic pads to sintered or a more winter-specific compound is one of the best things you can do to improve your winter riding experience.
You’ll have more control on the trails and won’t be needing to replace your pads after every 2nd ride, making one less barrier to getting out and actually riding!
A Question for You
What changes have you made to your mountain bike to get it fit for winter? Let us know below in the comments.
Image credit: Phil and Pam Gradwell on Flickr.


What’s up it’s me, I am also visiting this site daily, tgis site is actually pleasant and the users are really sharing fastidious thoughts.