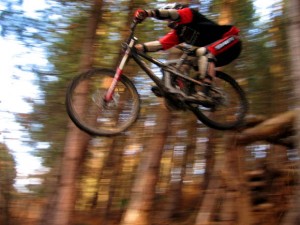
 When it comes to mountain biking everyone has their limits. It may be that you don’t like riding uphill or that you struggle when coming down them. Some riders are adrenaline junkies who throw themselves at everything, while others are more reserved. Whichever you are, there will be a point in your riding where you hit a wall and need some help.
If that wall is hitting drops, then hopefully this tutorial will help to give you a better understanding.
Step One – Mentally Prepare
There’s a reason you haven’t already flown over that drop, and it’s because you’re scared of it. The only way to conquer this fear is to overcome it and the best way of doing that is by starting off small and working your way up. Knowing how to handle smaller drops will make you much better when it comes to the larger ones.
Step Two – The Need for Speed
Ask any experienced rider and they will tell you ‘the faster you go, the easier it is.’ And strangely enough that’s almost exactly how it works. If you’re going at speed then your momentum will simply carry you over the drop, approach it at a crawl and your front wheel will drop first probably sending you over the bars.
Don’t attack it at breakneck speeds, however, as this could make you overshoot the landing and end up in a tree somewhere off the side of the trail. Try and hit it with enough speed to shoot over the top but not so much that you will lose control when you land.
Step Three – Preload and Hang Off
If you’re already familiar with preloading your suspension (on a full sus bike) then you will want to do this when approaching the drop. For those who are unaware, this simply means compressing your suspension by lowering your body into the bike – like you would if you were going to spring into a standing jump.
When you get to the edge you want to quickly spring up in order to help lift your bike over the edge. You need to ensure that you’re popping your front wheel up at this point, otherwise it could end in tears. Once you’ve sprung you need to centre your weight over the back wheel, essentially hanging off the bike – this will prevent you from nosediving and keep the bike going straight and true.
Some people freak out once they get a bit of air and this often leads to loss of control and a crash. Stay calm, keep the bike as steady as possible and align the wheels with your landing. Make sure that your legs are extended in the air, so that they can help to absorb the impact of the landing. Ideally you want both wheels to land at the same time, but when you’re starting off try to get the back wheel down first and work from there. Whatever you do, DO NOT HIT THE BRAKES IN THE AIR. This will throw your balance and makes a very rough landing – wait until you are in control with all wheels on the ground before applying stopping power.
Step Five – Breathe and Repeat
Once you know you can do something it becomes about practice. Repeat the same drop a couple of times until you know that you have it nailed, then work your way up to bigger drops. The technique remains the same no matter what size the drop is, and the most important thing to remember is that speed is key!
About the Author: Grinding Gears is all about helping the average mountain biker get out on the trails. With over a decades worth of experience riding MTB across a range of disciplines, Grinding Gears provides the reviews, guides and ‘how tos’ you need to get the most enjoyment out of the mountains.


I’m really loving the theme/design of your blog. Do you ever run into any web browser compatibility
issues? A handful of my blog audience have complained about my blog not operating
correctly in Explorer but looks great in Chrome.
Do you have any advice to help fix this issue?